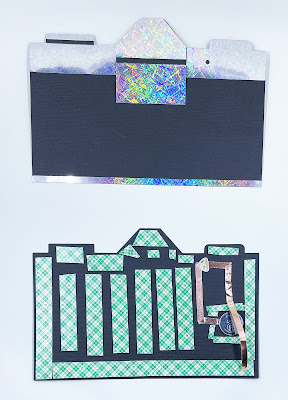
In this challenge (eCal, SCAL & Create FB page) we were asked to make something (anything) with a travel theme. We were to mat it in our eCal, SCAL or Create software (I use Create). We were to select an appropriate font, have a shaped mat or base and have an interactive component. I designed this camera card, the base of such being from Love SVG. I used a Fiskar's texture plate to make the snake texture of the black on the front.
I added a shutter that contained a photo of my travel mates and a distant cousin in Brescia, Italy. We are at the San Martino Tower in Brescia. The shutter element is a freebie from SVG Nation (look for the step-by-step tutorial on her site).

The very back of the card was designed with the outline die cut top of some of the landmarks all in black. I then did another layer print-2-cut of the image. Most of the print design is done in Affinity Photo, saved as a png file, then traced in Create. Here's the front with just the basic elements, less the shutter portion. I decided where I wanted the light (flash), and punched a small hole.
I used the chibi site to get ideas for how to "make it go." I first applied the copper foil, the positive side on the right and the negative on the left. I left around an 8th of an inch away. The place in between the tape is where the pencil mark I made where the light will be. The chibi chip is placed there, the pointed end on top of the negative copper foil and the wider positive side touching the right copper foil.

It's time to decide where the battery will be. I placed mine so that I would be able to make a button on the front to push to make the light go on. The negative side of the battery goes down, over the end of the left copper foil. I left the right copper foil loose until I get the foam tape applied.
The foam tape is necessary to give space for the copper tape and battery. I added a second layer of foam tape around the battery, as I didn't want the foil tape to contact the positive foil.
Next I took a small square of acrylic, and adhered it to the foam tape around the battery (on three sides). Before adhering to the top edge, I adhere the tape over the top of the acrylic, then wrapped it around the bottom so that it could make direct contact from the battery. But, with the acrylic well above the battery, it won't turn the light on until I push the acrylic down onto it. If you look closely you can see the acrylic resting on my finger.
Here's the inside completed.
Please note that there are many ways to use the chibi chips. You can go to chibitronics.com and find lots of ways to map it out. Also, you can use multiple chibi lights in a given project. Again, check out the chibi site or you tube for more ideas.
Time to take off all of the foam tape and place the 1/8" spine piece to the back of the front camera piece. This will wrap around to the front of the back piece. Then, very carefully place the front camera piece over the foam tape.
Here's a photo of the spine edge so you can get an idea of the 1/8" spine.
And, here's the final photo showing me pushing down the Chibi button and "flash" coming on. Very satisfying project!
Travel the World and Document It!


No comments:
Post a Comment