Tuesday, December 10, 2019

Christmas Tags 2019 - Eclips/Ecal Challenge

Here we are again, making some more holiday tags for the Eclips/Ecal Facebook page challenge. I wasn't able to do all 12, but did the best I could (did only five of them).
Not sure from where the idea for this one came, but it was one of my faves.

The pattern for this one came from SVG Cuts.

And, the next three I found on Pinterest, and just did my own rendition.


Merry Christmas and Happy New Year!!!

Thursday, October 10, 2019

Raffle Basket Submission

I submitted this as a small gift for a raffle basket for my Jazzercise class to support breast cancer awareness.

The pattern for the box came from Dreaming Tree's Star Gift Box SVG.
I made sugar-free shortbread cookies.
And, a small bottle of wine and some dark chocolate.
I hope whoever received it enjoyed it!

Celebrate Health and Happiness!

Monday, September 9, 2019

Simple Birthday Bucket and Note

I love the way this little bucket turned out, most notably the distressed background stamp used on the solid A/C card stock. This bucket and the little note card are freebies from Dreaming Tree
Very easy to make. I filled the bucket with some mini muffins. The note card is actually a place card, but worked great as an enclosure card.
I made this for a sweet friend and gave it to her at her birthday brunch.


Happy Birthday, Julie!!!


Monday, May 6, 2019

Springtime Flowers - WRMK Foil Quill

Another challenge over on the Elcips/Ecal FB page. This challenge was to make a shaker card using flying bugs (butterflies, ladybugs, bees, etc.). Then to add a sentiment using the foil quill (or the print-2-cut technique). These challenges are done to encourage us to learn new techniques and create with them. They are always fun, and I learn something new each time.

Here's my submission:
I designed the layout and cut file myself in the ECAL software (cutting software for the Sizzix Eclips). Since it's a shaker card, there are two panels. I made a flower pot in Photoshop, then opened in ECAL and set the cut tool to "Pen" so that it would draw it instead of cutting it or printing it. I then used the new We Are Memory Keepers Foil Quill tool (medium tip) to draw the pot using Spellbinders Glimmer Hot Foil (Cobalt Blue). Next was the front panel, where the inside of the pot was to be cut out for the shaker portion of the card. Again, I used the foil to outline the pot and outline the panel.

I did a print-2-cut for all of the bugs, and again on the three flower centers where I used the same color of foil with the pen tool, this time using the fine (smallest) quill tool. I was surprised how intricate it wrote the words. The smallest circle was about 1/2", so the word size is less than that. And, the largest circle for the word Sprung was just under an inch. I was pretty impressed with how clearly it wrote!

The only thing I did differently as far as cutter settings while using the quill was to slow the speed a bit so the heat tip could do its job. I've done this each time, so I can't say that it makes a difference as I haven't tried any other way. However, I've seen a few posts where other crafters have said they slowed theirs down so I followed suit.

The flowers were a free svg download from  the blog: The House that Lars Built. It was a post from April 27, 2016 for some Mother's Day Cake Toppers that were just darling. You can still go to her blog and get the free download for pdf or svg cut files. I think they are the cutest flowers.

To adhere the front piece to the back piece I used white fun foam with double-sided tape. The entire upper portion of the card is one large piece of fun foam, so it was easy to assemble the flowers on the flat surface. Then more fun foam strips along the bottom edges and outlining the pot, and then filling in the empty space between them.

The shaker portion was done like a typical shaker card, surrounding the outer card edges and the pot with white fun foam and using a small piece of acetate for the window.

Hope this was informative, and that you enjoyed the making of my Spring has Sprung card. The inside will say "...The grass is ris. I wonder where the flowers is." My mom always recited that little ditty of a poem when I was growing up, so this definitely reminds me of her.

Hope Your Flowers have Ris!


Friday, April 19, 2019

Spring Tags Bunny Hop (Eclips/Ecal)

Another fun little hop over at the Eclips and Ecal Users Facebook page. We were to make five Easter-themed tags and post one a day for the five days leading up to Easter.

Firstly, I had a hard time finding Easter-themed digital paper that I liked very much, but finally found this darling digi paper on Etsy by Digital Scrap World called Cute Spring. I love these prints and the soft colors. 90% of the tags were made with these papers and elements.

This is the first tag. I designed a cut file in ECAL3 in the style of a shadow box card, but, unlike shadow box cards that fold flat, I closed the box completely on the top and bottom. It's only 1/4" thick, so the one layer inside is only 1/8" from the front and back. I designed the tag hanger and main front piece in Photoshop, and did a print-2-cut with them, as well as the butterflies, carrot and sheep.
Tag #2 is made using the same basic cut file as the first one. The little peaking bunny cut file is from a freebie card by Dreaming Tree. You can download it for your own use by clicking on the link. The paper is again from the Cute Easter paper pack, and the elements (carrots, ladybug, chick, flower, and banner) were from the same paper pack and cut using print-2-cut.

I designed Tag #3 in the Ecal software to make a shaker tag. The shaker items include a few two-sided eggs that I cut-2-print and glued back-to-back. The little egg you see in the background of the actual shaker is a free Easter card from Simply Crafty SVGs, and you can get it by clicking on the link. The upper tag header image is made from Echo Parks' Celebrate Easter paper pack (digital collection).
I designed Tag #4 making a little pull tab so that the chick pops out. I just winged it with the pop-up mechanism from making a couple of like cards in the past. The background paper with the chicks is by Echo Park, from their Celebrate Easter paper pack.
And, lastly, #5 was done by layering four separate solids from the Cute Easter paper pack, along with the three decorated block panels and eggs, all cut using print-2-cut. The Happy Easter wording image is a free digital download by Creative Fabrica. Again, you can click on the link to get the cut file. I altered it a bit to fit the upper section. 
And, there you have it. These were so fun to make. I love the challenge of making my own cut files, and this was definitely that. Thanks for taking a look. And, thanks to Dreaming TreeSimply Crafty SVGs and Creative Fabrica for sponsoring our challenges on the Eclips and Ecal Users Facebook page. And, of course, thanks to Jan for organizing our hop!

Happy Hopping!

Friday, March 8, 2019

Valentine Card Dexterity Puzzle & Treat Box

This little ditty was made for my grandson for Valentine's Day. Remember the little puzzles we'd get in the Cracker Jack boxes (I'm talking old school, of course!)? I designed the inside background in Photoshop, and traced it in ECAL to cut with my Sizzix Eclips. Around 16 layers of the heart outline were added to make it thick enough for the ball bearings to freely roll under the acetate.
Each year when I host Bunco (in February), I make a little treat for my Bunco girls. This year I made a little "sour cream" container that I filled with See's Candy. I made the svg cut file, and added a perforation across the top so that it would be easy to open, and added a clear label that said "Tear along perf". Super easy! Finally, I added a little print-2-cut tag and bow.


Happy Valentine's Day!

Springtime Background - Eclips Challenge Feb/Mar 2019 (process post)

Our challenge over at the Eclips/Ecal FB page for February/March 2019 was to make a springtime background using only shapes that we designed ourselves in the software. All shapes and gradients, etc. were to be original. We were to work with gradients, print-2-cut, pattern fills and effects.
This will be a process post to show the steps I took to get to the final project.

I started out with a very simple gradient.
Then added square 12 tiles, in different pastels colors. I used the radial gradient and the "bulge" effect in the Effects menu.
I cut these tiles out, curled the edges in and attached them to the initial gradient piece with one circular thick adhesive foam dot. It gave it lots of dimension and a 'pillow' effect.

Next was the tree!
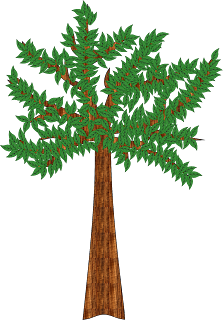
The bottom main part of the trunk was made using a vertical rectangle and the barrel distortion and bridge warp. For the top of the tree I used an asterisk, and then altered the nodes like a mad person to pull out the individual branches. I then used "union" to merge the two into one piece. I used a woodgrain tiled pattern (digital scrapbook paper) to fill it in.

Next was the leaf. This was made with a basic heart shape, altered, filled with a gradient, and then added the veins and grouped them all together.
These were sized to less than a half-inch tall, so very tiny. I copied/pasted a bunch of them and flipped it horizontally so that they'd be facing two ways. I placed each leave on the tree individually. This took a couple of crafting sessions!
After putting all of the leaves on the tree, I snipped it and saved the entire tree as a png. It was traced in ECAL. I used a print-2-cut to cut it out, so it was a stand-alone piece.
Next was the apple. This was again made with basic shapes. The stem was an altered rectangle, and I used one of the tree leaves as the leave on the stem. I did take this one into Photoshop and added the shine, as I don't think you can displace the center point of the gradient in ECAL. [After I finished the blog post, I realized that this apple may look more like a tomato! ha ha ha! oh well!]

The apples were sized down to about 1/2" wide.

Next the banner (Thinking of You). Again I used a rectangle strip, cut out the "V" at the right side using back-minus-front with a star in basic shapes. It was filled with a pattern, outlined, and skewed using the wave effect.

I duplicated a bunch of apples, a bunch of individual leaves and the banner, and did a print-2-cut. Then I individually inked every single apple and leaf (time consuming, and got very red and green fingers).
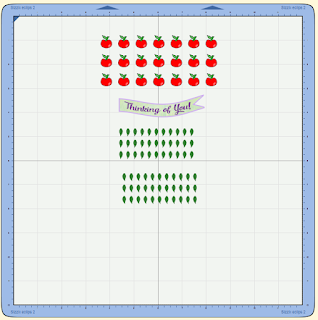

It was time to assemble everything. I glued down the tree, and added the banner. Then added some individual leaves right on top of the leaves of the tree to give it a bit more dimension, and some apples. And, having the "pillow" effect also gave more dimension, as the tree is glued only on the upper portions of the pillow, so much of it is suspended.

I think that brings us to the end. Funny when you look at projects as a whole, you don't realize all of the work, time and details that go into it. This was pretty detail intensive.

Again, here's the final product. I love our challenges. We always learn so much about the software. And, if you're curious about the software, ECAL, it's pretty much the same as SCAL (Sure Cuts a Lot by Craftedge). It's a version of SCAL with a few more features that was made just for the Sizzix Eclips and Sizzix Eclips 2 electronic cutting machines. So, if you have ECAL and can't find basic tutorials, you can always search for SCAL tutorials and you'll probably get the info you need. And, of course, you can join us on our Facebook page, and you'll have more help that you can imagine from the great paper crafters there. We have a ton of fun!


Happy Springtime!
! 

Saturday, March 2, 2019

St. Patrick's Day Treat Pot-O-Gold

Wow, I cannot believe that a year has passed without me posting what I've been working on!!! This is NOT acceptable. So, I will look through old photos and see if I can do an update to cover some of what I've been working on.

This is a simple treat "pot" that I made for my grandson. If you want to know the fastest and easiest St. Paddy's day treat holder, this little lucky pot-of-gold is the ticket. I was able to cut this out (all one piece) and glue it together in a couple of minutes. Did a p-2-c on the strip and the Leprechaun (grandson's face superimposed in the leprechaun). Normally the simplest project still takes me hours. I wanted to take something for my grandson, but only had a few minutes. It was so easy! I put some green raffia grass in it, and a few See's chocolate gold coins and a $5 gift card to Target inside. Oh, and I couldn't find pipe cleaners fast enough in my stash, so I cut two strips of black fun foam, and glued them together except for a half inch at the ends. I spread them apart and slid over the hole tab, used some glue, then stuck a brad in there. Easy peasy. And, as a 4-year-old, he loved it.


MAY YOUR LUCKY STARS SHINE BRIGHTLY!

Sunday, January 20, 2019

Storing Vintage China Christmas Bell Ornaments

My grandma decorated her Christmas tree with these little Porcelain bells for as long as I can remember. I'm assuming they have been around since the 40s, well before I was born. They have such a delicate ring, and images and sentiments on each one.  I am lucky enough to have received them upon her death, and I do treasure them.
Up until this Christmas I have stored them in their original box, a small kraft, lightweight cardboard box that did not offer a whole lot of protection. I couldn't protect them anymore in that original box as it was falling apart, so decided to make a box just for them. I did keep a piece of the top of this box, as you can see in the above photo, which showed the cost of the whole box of 10 bells (78¢) or or one bell (9¢). I glued this piece of the old box into the lid of the box I made, along with a tag with my grandmother's name/dates/my name, etc.
I designed this box to be the exact size I would need to store the bells. I made the insert to keep all the bells separated. I first made a mock-up of the inside separators by cutting scraps of cardstock by hand, and then followed this by making a svg cut file from scratch in the ECAL software (a version of SCAL made specifically for the Sizzix Eclips electronic cutting machine). This is what the insert cut file looked like once designed.
The box works perfectly for the bells.The top image was designed in Photoshop.
Thanks for taking a look, and sharing this little memory with me.

Happy New Year!


Sunday, January 13, 2019

Winter Christmas Wreath

This pretty wreath is made with svg cut files from Dreaming Tree. It was very easy to make with a wooden wreath form purchased at Michael's, which had holes in it that corresponded with the holes in the wreath pattern pieces.
Happy day!
Spread the Cheer!